Code sharing between React and React Native applications
· 8 minute readSharing code between the web and native was one of the most interesting React Native questions since its appearance. It wasn’t the original goal of the React Native but when all our code base is written in one language it’s a natural desire to remove code duplication and reuse as much code as possible.
The approach I’m going to explain is based on the fact that React Native loads platform specific Javascript modules based on their extensions. In the official documentation it is called platform-specific extensions:
React Native will detect when a file has a .ios. or .android. extension and load the relevant platform file when required from other components.
It also detects .native extensions which can be used when iOS and Android code looks the same.
So let’s see how to use this knowledge to create a cross-platform application which reuses as much code as possible.
Example application
To explain the approach I’m going to use a simple example application with one scene (page) which contains a title, ‘About’ button and ‘Help’ button. I’m going to put code examples here in the article but you can also checkout the sources.
How to start?
It is easier to begin with a React Native skeleton generated by react-native init command. It will create entry points for iOS and Android applications. In the generated project we need to create an index.web.js file which will be an entry point for the web application and the web directory to contain the web specific files: HTML, CSS, javascript, assets, etc. All our application code will reside in the app directory.
Assuming that the root component of our application will be called App, our index.web.js will look like this:
import React from 'react';
import ReactDOM from 'react-dom';

import App from './app/components/App';
ReactDOM.render(<App/>, document.getElementById('root'));
index.ios.js and index.android.js in our example will look the same:
import React from 'react';
import { AppRegistry } from 'react-native';

import App from './app/components/App';
AppRegistry.registerComponent('ReactNativeCodeReuse', () => App);
Now let’s go through the different component types and see what their implementation could be.
Simple components with no logic
Components with no logic are basically views. Since the web and native use different components for UI, we don’t have much choice except providing separate views for each platform.
In our example application, we have the Title component which only displays a formatted title.
The following web specific code goes into TitleView.js:
export default () =>
    <h1 className="title">
        React Native Code Reuse (Web)
    </h1>;
iOS code goes into TitleView.ios.js:
export default () =>
    <Text style={styles.title}>
        React Native Code Reuse (iOS)
    </Text>;
And Android code goes into TitleView.android.js:
export default () =>
    <Text style={styles.title}>
        React Native Code Reuse (Android)
    </Text>;
Note, that we are using a functional components syntax.
Then, in the package index.js, we import the view and export it back to the outer world. React Native will import the correct module based on its extension. In this way the implementation details will be hidden from the component user, which is good.
import TitleView from './TitleView';
export default TitleView;
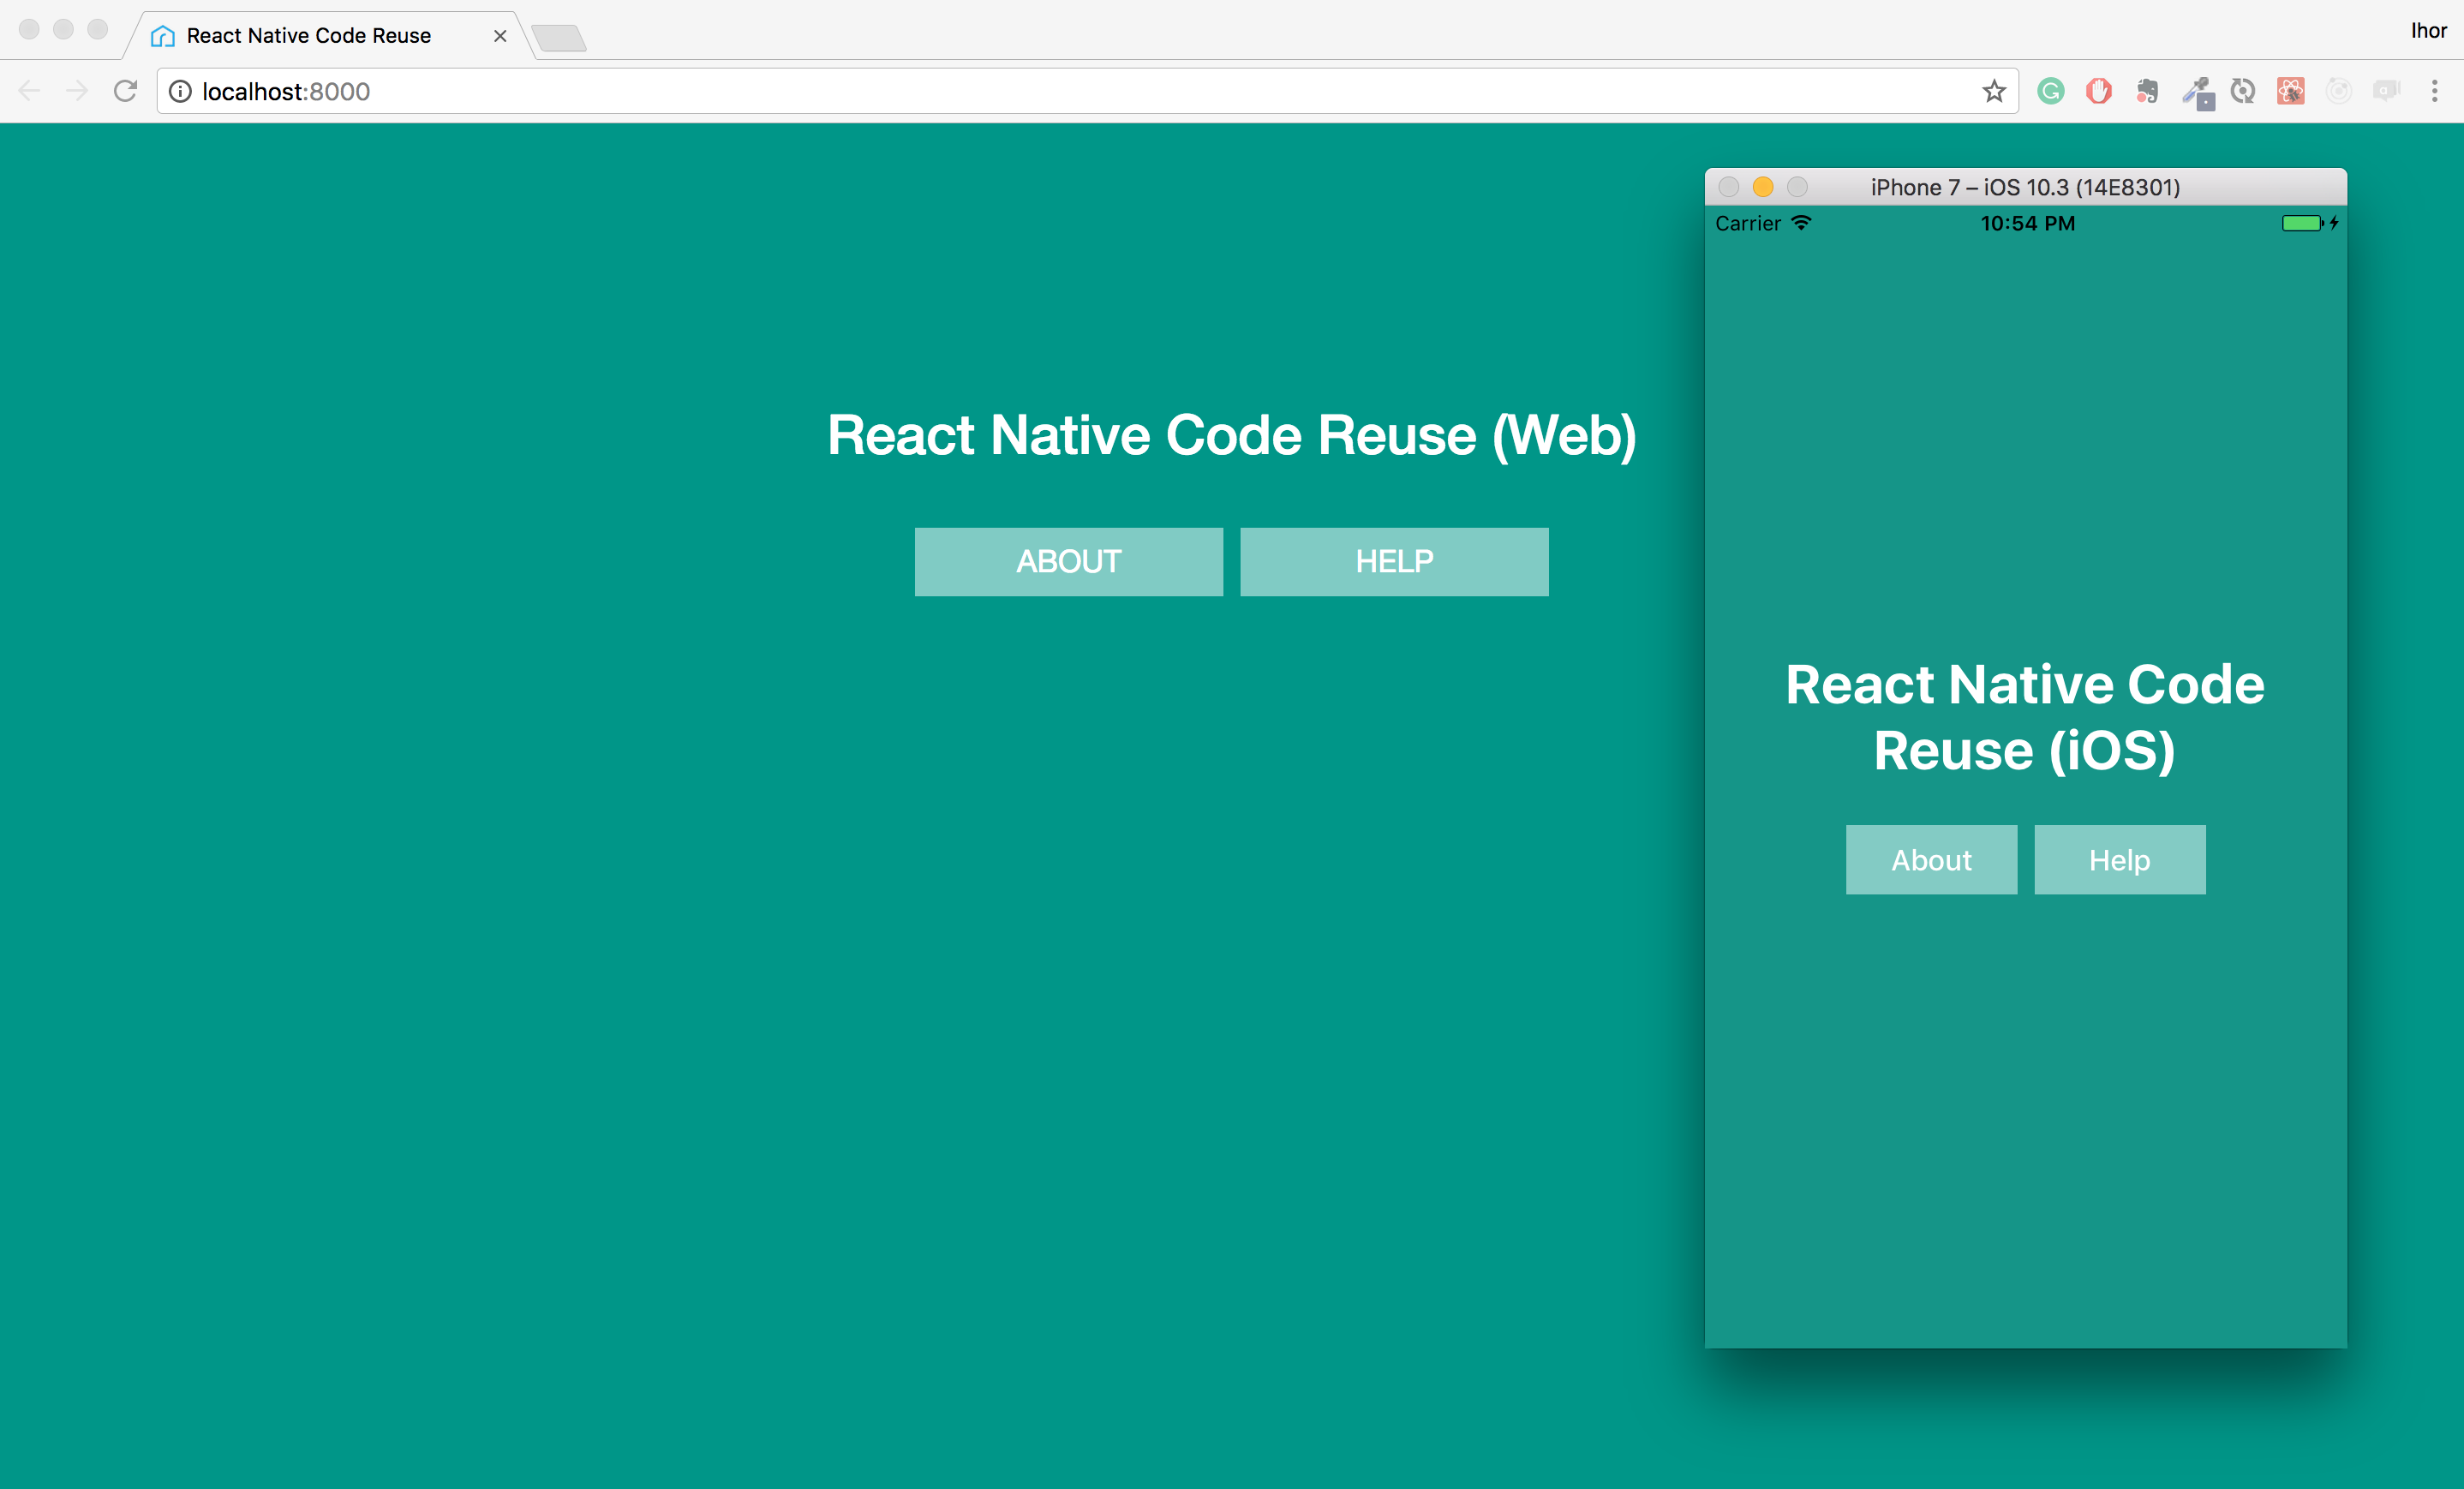
If we run the app we’ll see different title text for the web and iOS:

You can check the component sources here.
Components with logic
For components which contain some internal logic, it is very natural to use presentational and container components approach. We put the logic, which should be common for all platforms, into the container component and provide different views for each platform, like we did previously for simple components with no logic.
In our example, you can see that this approach was used for the App component.
However, I’m going to show a little bit more complicated case when we have platform specific code in a container. In our example, it’s the About Button component.
We have to process onClick event differently for the web and native. The simple solution to the problem is to use an abstract class.
So we are going to have an abstract container AbstractAboutButtonContainer.js:
export default class AbstractAboutButtonContainer extends React.Component {
    constructor(props) {
        super(props);
        this.onClick = this.onClick.bind(this);
    }

    onClick() {
        throw new TypeError('Abstract method onClick is not implemented');
    }

    render() {
        return <AboutButtonView onClick={this.onClick}/>;
    }
}
Container for the web AboutButtonContainer.js:
export default class AboutButtonContainer extends AbstractAboutButtonContainer {
    onClick() {
        alert('This is an example application to show how to reuse code between React and React Native');
    }
}
Container for native AboutButtonContainer.native.js:
import { Alert } from 'react-native';

export default class AboutButtonContainer extends AbstractAboutButtonContainer {
    onClick() {
        Alert.alert('This is an example application to show how to reuse code between React and React Native');
    }
}
Web view AboutButtonView.js:
export default props =>
    <button className="button" onClick={props.onClick}>
        About
    </button>;
Native view AboutButtonView.native.js (note that we providing only one view for both iOS and Android platforms):
export default props =>
    <Button
        onPress={props.onClick}
        style={styles.buttonText}
        containerStyle={styles.button}>
        About
    </Button>;
As earlier, in the component index.js we import the container and export it back:
import AboutButtonContainer from './AboutButtonContainer';
export default AboutButtonContainer;
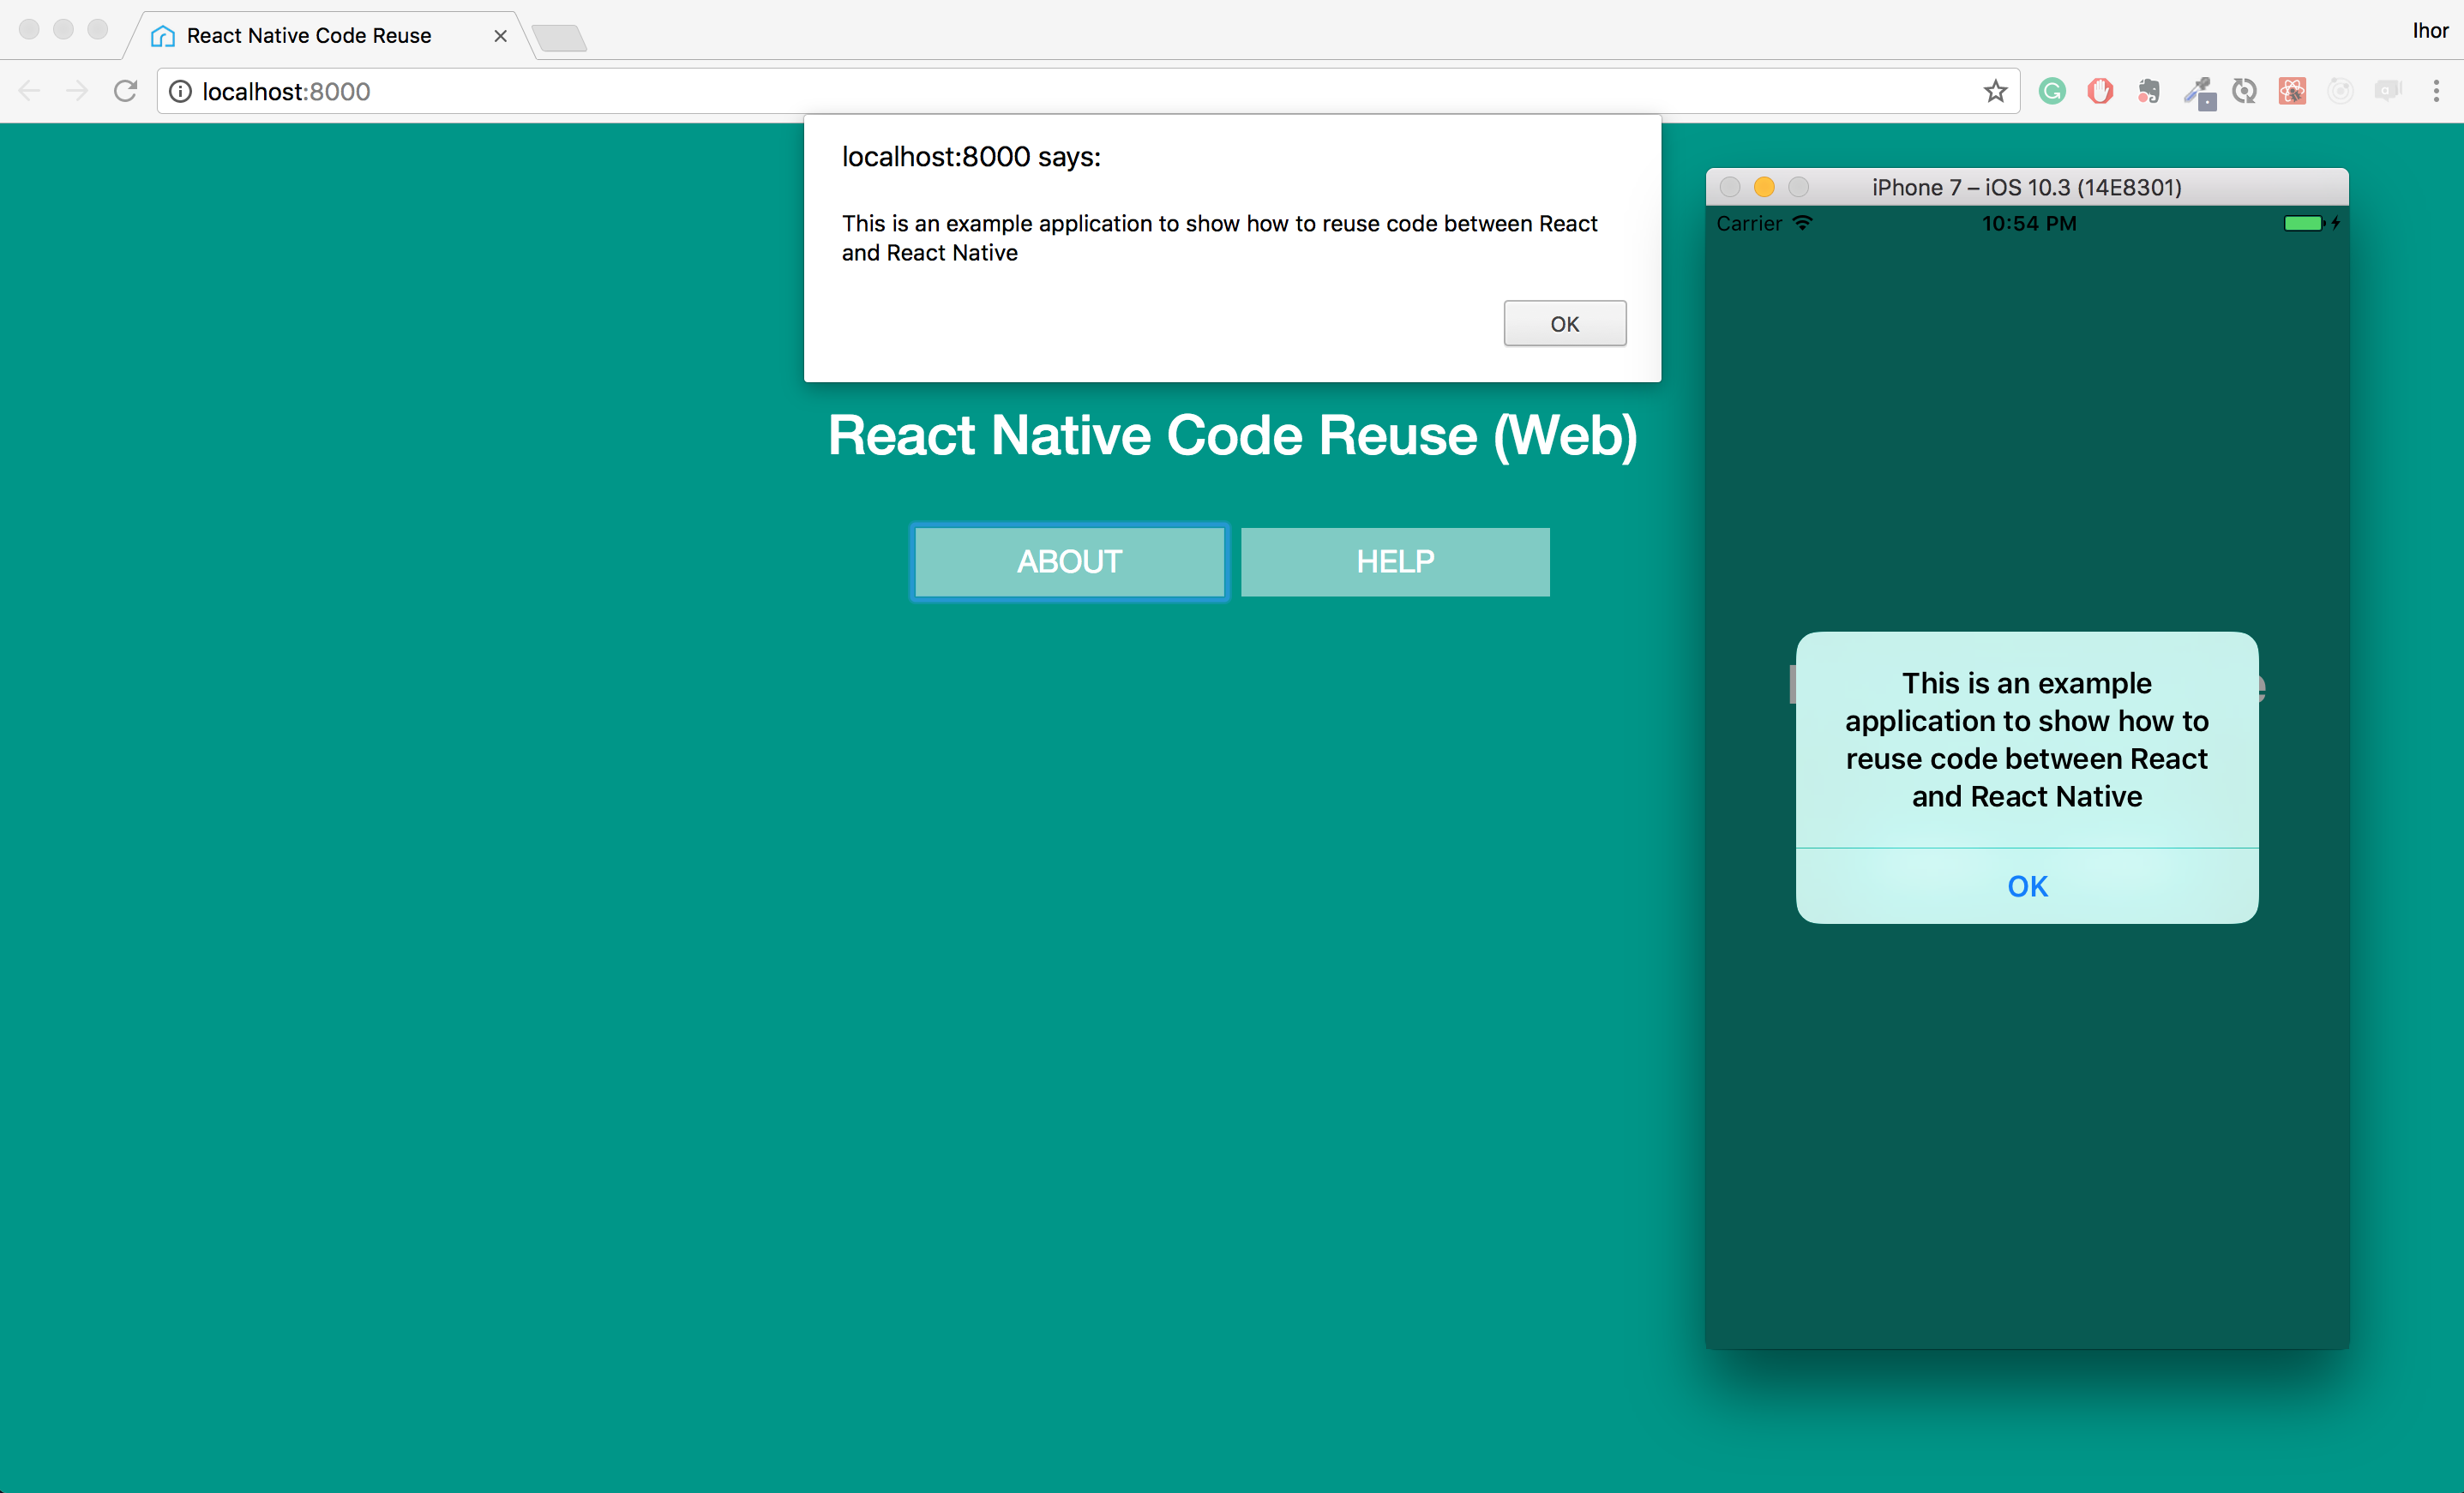
If we run the app and click the ‘About’ button we’ll see two different platform specific popups with the about information:

You can see the component sources here.
Another possible solution for this case is to introduce the
alert.jsmodule which will handle cross-platform functionality internally. But I wanted to show this specific approach with components and it’s not easy to come up with ideal synthetic examples.
Components connected to the Redux store
In order to avoid code duplication in connected components, we need to connect them to Redux store in the component index.js.
Let’s have a look at the Help Button component which displays a number of help requests made during one application session. We need to provide it with a number of previous ‘Help’ button clicks which will be stored in the Redux store. Also, we need to pass it an action creator to dispatch the HELP_BUTTON_CLICKEDaction and increase the stored value.
We’ll use a similar approach as we just used for the components with logic. The only difference will be in the index.js file which will contain the following code:
import { connect } from 'react-redux';

import { helpRequested } from '../../actions/help-actions'
import { getHelpRequestsNumber } from '../../reducers';
import HelpButtonContainer from './HelpButtonContainer';

class HelpButton extends React.Component {
    render() {
        return (
            <HelpButtonContainer { ...this.props }/>
        );
    }
}

HelpButton.propTypes = {
    helpRequests: PropTypes.number.isRequired,
    helpRequested: PropTypes.func.isRequired,
};

const mapStateToProps = store => ({
    helpRequests: getHelpRequestsNumber(store),
});

export default connect(mapStateToProps, { helpRequested })(HelpButton)
Instead of simply importing and exporting the container we wrap it in the root HelpButton component which we connect to Redux.
Then the same as earlier we are going to have an abstract container AbstractHelpButtonContainer.js:
export default class AbstractHelpButtonContainer extends React.Component {
    constructor(props) {
        super(props);

        this.onClick = this.onClick.bind(this);
    }

    onClick() {
        this.displayMessage(`You asked for help ${this.props.helpRequests + 1} time(s)`);
        this.props.helpRequested();
    }

    displayMessage(message) {
        throw new TypeError('Abstract method displayMessage is not implemented');
    }

    render() {
        return <HelpButtonView onClick={this.onClick}/>;
    }
}
Container for the web HelpButtonContainer.js:
export default class HelpButtonContainer extends AbstractHelpButtonContainer {
    displayMessage(message) {
        alert(message);
    }
}
Container for native HelpButtonContainer.native.js:
export default class HelpButtonContainer extends AbstractHelpButtonContainer {
    displayMessage(message) {
        Alert.alert(message);
    }
}
Web view AboutButtonView.js:
export default props =>
    <button className="button" onClick={props.onClick}>
        Help
    </button>;
And native view AboutButtonView.native.js:
export default props =>
    <Button
        onPress={props.onClick}
        style={styles.buttonText}
        containerStyle={styles.button}>
        Help
    </Button>;
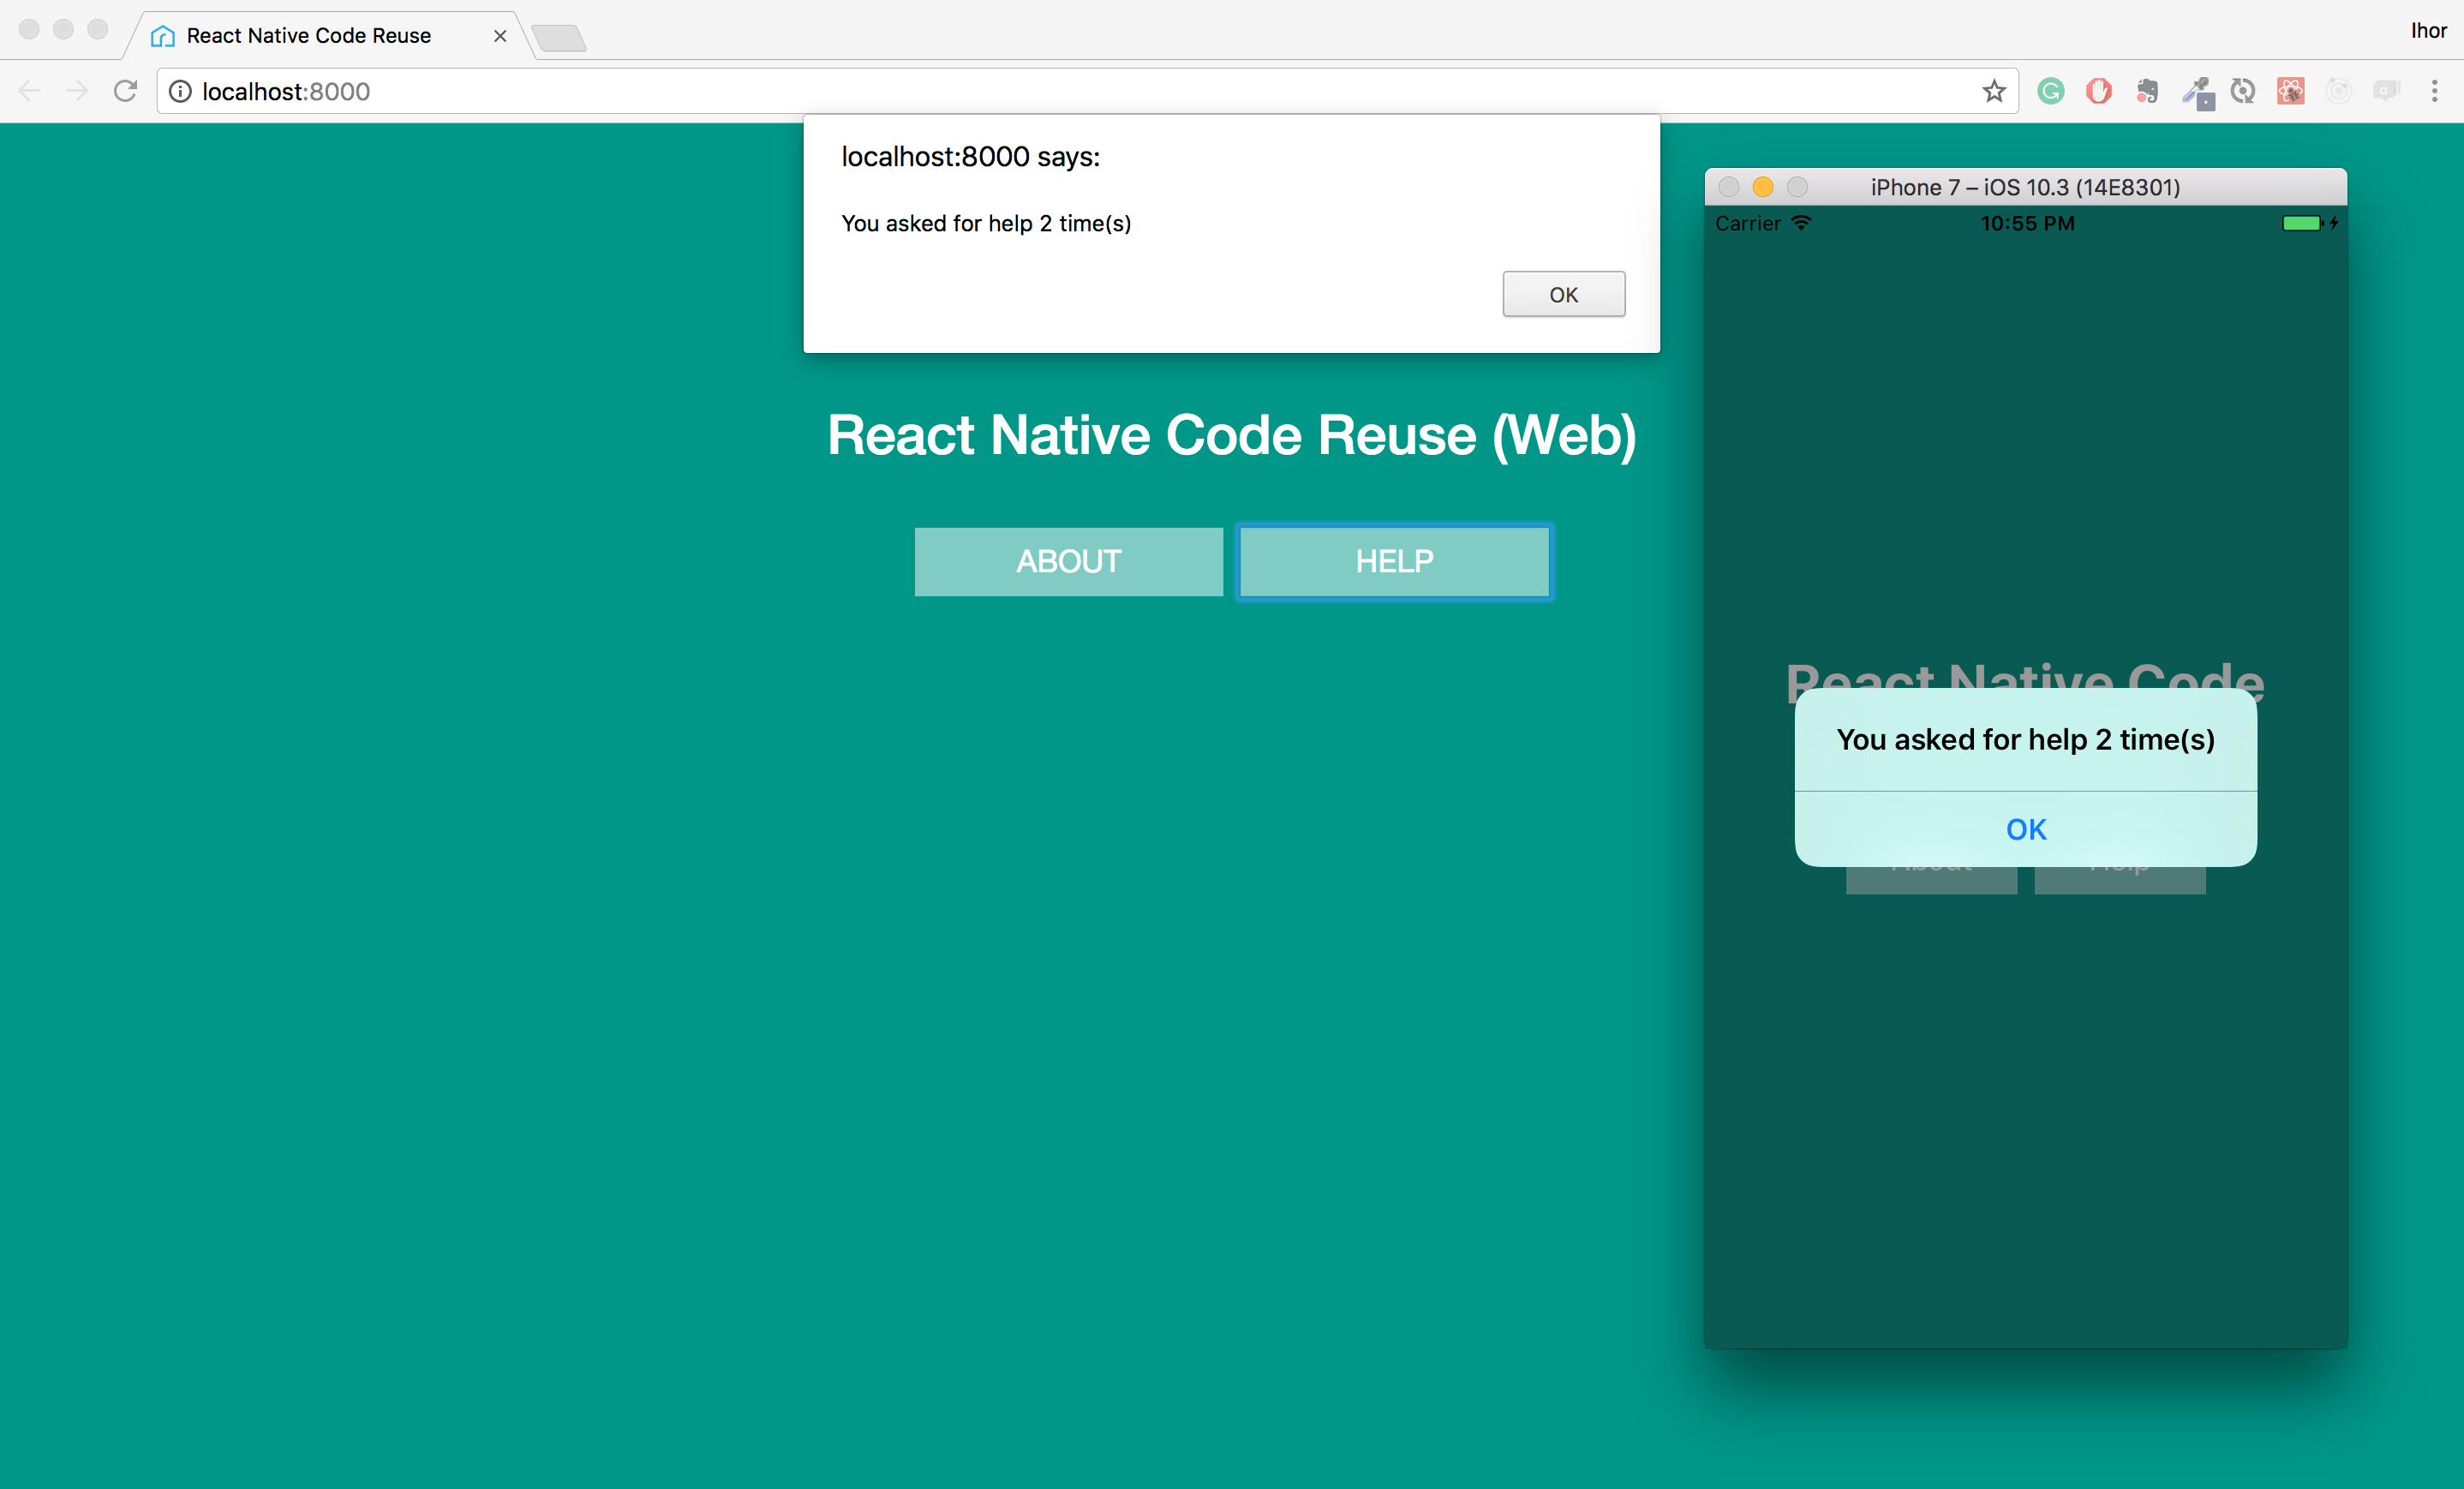
If we run the app and click the help button two times we’ll see that number of clicks is counted:

You can see the component sources here.
What’s next?
We analyzed three types of components and specified how to share code between different platforms for each type.
In real world applications, we will also have actions, reducers, routers, utilities and other services. Most of them will be cross-platform which doesn’t require any actions from us. We import and use them as if we were writing code only for one platform.
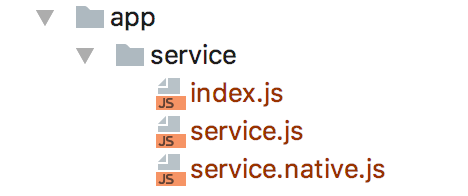
For services, which have different implementations depending on the platform, we can use the same solution as we did for components. We create a directory with the web implementation service.js, native implementation service.native.js and simply import and export the service back in the index.js file.

Some services or components will be present only on particular platforms. In such case, I put them into platform specific subdirectories: app/web or app/native, where only platform related code resides.
Conclusion
The approach is very simple and is very easy to use. Instead of having several platform specific applications we have only one cross-platform application. Separating modules based on their functionality instead of a platform makes it very convenient to develop all platforms in parallel.
The example app is very simplified. It is not following all the best React/React Native practices and shouldn’t be used as an example of well-designed React application. The goal was to explain the approach easy for understanding, providing many examples but still keeping it a short read. Some not topic related things weren’t explained at all. Some possible complications of given solutions weren’t provided (e.g. using of abstract views) but that’s something you can figure out yourself based on your particular situation. If you have any questions please check the sources or ask me in comments.